Over the years Iv'e had the pleasure and pain of working on various projects of all shapes and sizes from classic cars to stock cars to fishing boats, over the years images have been lost but not the memories, so rather than keep future memories locked in the vast vault in my head they are going on here, hope you enjoy
Friday, 23 December 2011
Xmas is a comin
Not an awful lot to share as unfortunately the good lady wife has had a knee replacement so progress has slowed, so here are a few picks to finish the year off.
Ive got one of these to reproduce for the heat exchanger, this part connects to the rear of the heat duct that runs down the centre of the chassis and from this a pipe goes over the axle pivot tube.
Bought a couple of new toys or so for the new year, bead roller to put ribs and steps in panels rather than forming them by hand, hopefully will speed things up, a replacement shrinker/stretcher that will allow me to replace my worn one and a set of rolls so I can finally build a wheeling machine and finally accumulated enough info to make a pullmax style power hammer, got to be good.
Many thanks for those who have viewed the blog and Ill be inviting comments from anyone viewing so hopefully I can learn more as I go along, have a good Xmas
Tuesday, 6 December 2011
Plenty Of Welding Done, Camper Has Gone Up In The World
Mainly welding has taken place as well as fitting the jacking points
Nice clear shot
silla and inner sills all welded
Lower part of the rear tubs replaced
Still have the heater duct to fit and weld as well as the loom tube
And as per title, camper has gone up in the world
Nice clear shot
silla and inner sills all welded
Lower part of the rear tubs replaced
Still have the heater duct to fit and weld as well as the loom tube
And as per title, camper has gone up in the world
Friday, 2 December 2011
After alot of cutting and grinding progress is taking place
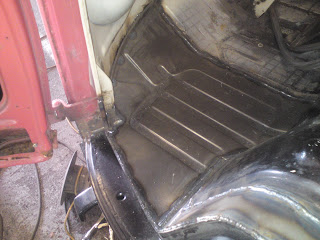
Wheel arch fitted and upper floor repaired.
Floor repair panel fitted and fully welded
Another shot of the chassis, the other side has now been done to match
Sill now tacked in to place as well as the rear sill repair panel
Floor runners all in place
B post repair, more welding to do
Better view of the floor rails etc
Removed all the paint and filler over the wheel arch repair, old repair but if you look closely you can see it is sloping forward by 1 inch.
I didn't like the way it looked so removed it and then cut the remainder of the old arch away.
New sill and the cut down repair panel wheel arch refitted
Looks better, runs in line with the louvres
Subscribe to:
Comments (Atom)


